Imagine you’re watching your website traffic–day in, day out–with a notepad in hand. You’re writing down every visitor that comes to your website, which pages they visit, what they do on those pages, and whether or not they make a purchase before leaving. After months of doing that and nothing else, you finally have a database of leads generated from your site traffic. Now you can start marketing!
…okay, you’re not gonna do that. The good news is that you can get that killer database without spending every waking hour putting it together. Our friend Meta Pixel’s gonna do that for you, no notepad required.
The Meta Pixel is a powerful tool that performs the already useful function of gathering site traffic data for you. But setting it up opens the door to do much more–it lets us use that data to put our Facebook ads where they’ll do us the most good with Retargeting.
Getting it set up is where things get tricky–and what we’ll be helping with today. The Meta Pixel isn’t an app, it’s a line of HTML code you put in your website’s code. It’s meant to be simple, and something you can set up on your own, but as with any of our advanced Facebook marketing tools, remember that you can have your website designer do this step for you. In either case, setting up your Meta Pixel is well worth the time, letting you focus your efforts on users who have seen your website before, and even seek out people who appear likely candidates as future leads.
Before we begin, remember that while Facebook ads can yield focused, noticeable results, it’s important to market them carefully–we don’t want our ads to show up for people who aren’t in need of self storage because it’s not a useful spend of your money. Furthermore, while Facebook ads are a great tool to use if you’re looking to fine-tune your marketing strategy, we highly recommend only expanding to Facebook after getting your Google ads, Google Business Profile, referral program, and word-of-mouth marketing strategies up and running first.
If your other avenues of marketing are showing the results you want, then it’s time to move forward with creating a Meta Pixel and tasking it with Retargeting.
Special thanks to Crazy Eye Marketing’s Meta Pixel video guide and Ben Heath for his Facebook Pixel guide, as well as Hootsuite’s Custom Audiences guide!
Let’s get started by creating your Meta Pixel. You’ll need a Facebook account for your business–but you’ve probably already done this step if you followed along in our Facebook Marketing Basics guide!

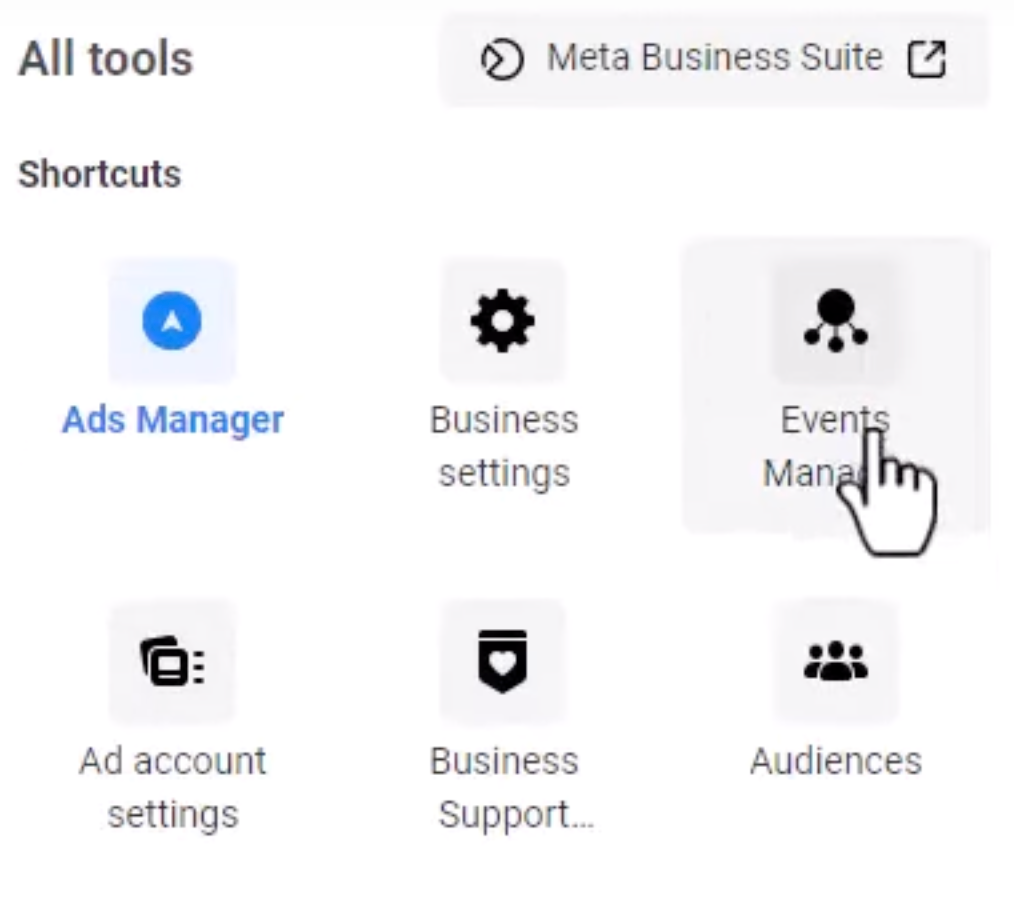
On your Ads Manager page, look for the Events Manager. Once you’re there, click data sources. Press Create in the top right corner of the screen. You should see an option to create a pixel. Press it, answer the questions Facebook asks you about you, and…
You’ve done it. You created a Meta Pixel.
You’re probably thinking there must be a catch, some hidden extra-advanced step lurking around the corner, but…nope. That’s how you create your Meta Pixel. And now that it’s made, let’s get it up and running on your website!
Before we add a pixel to your website, this may be a step that you can hand off to someone else. If someone else handles your website’s back-end–that is, the coding side of your website–then they’ll need to do this step.
Here’s what your web developer will need. Head back to your Ads Manager, find the set up pixel button and then choose Email instructions. Enter your web developer’s email into the box and send it along–they’ll get instructions on how to install it from there.
In the case of handling your website’s code manually, though, we’ll walk you through the remaining steps. Facebook offers a detailed guide for this step if you want to get even more advanced, but we’ll walk through the process in a more generalized sense here.
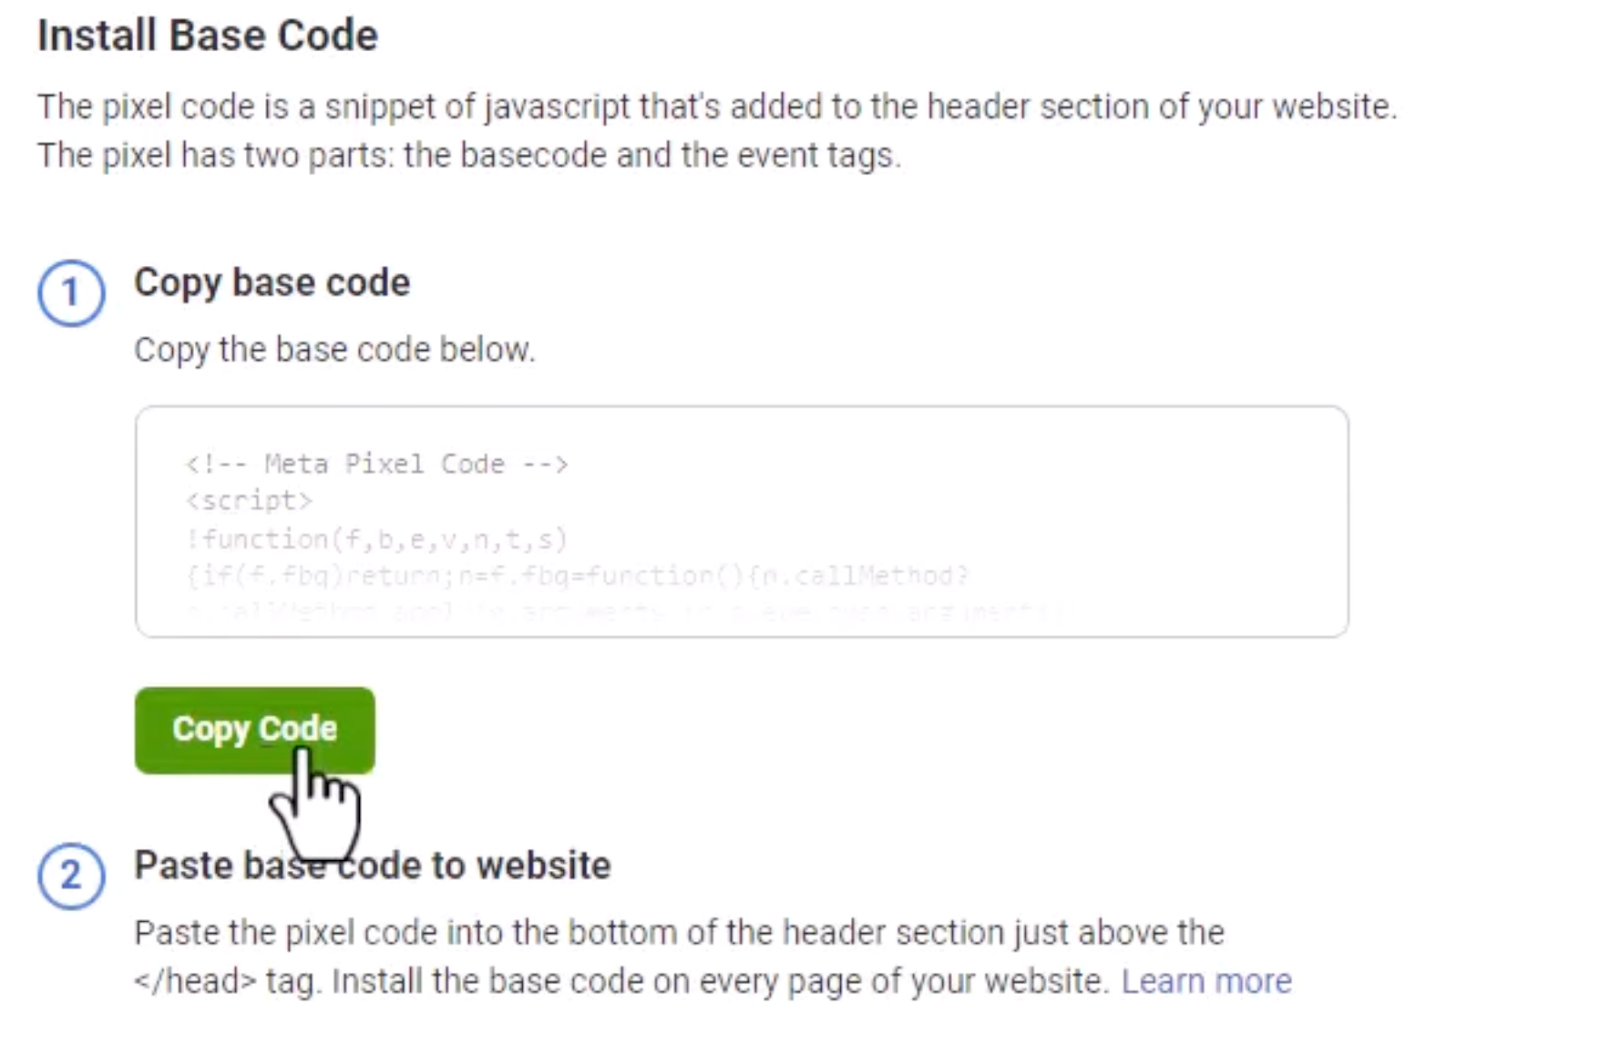
First, find the header code for your website. It should be between something that looks like <head> some code here </head>. Now, go to your Ads Manager and select Events Manager. You’ll find your pixel there–click on it and copy its code to your clipboard.
Next, paste that code into the bottom of your header code. Your new code should look like <head> some code here AND your pixel code </head>. If done correctly, your pixel is now part of your website’s code! You can put the pixel on every page that you want to track traffic and behavior on.
Once you’ve saved your changes, it’s time to test that it’s working. In your Ads Manager, find the Send Test Traffic button and press it. If your Meta Pixel is installed correctly, it should give you some results!
Now that your pixel is set up on your website, let’s take it a step further. It collects basic information now, like which users came to your website from Facebook or Instagram. But it can do more, and taking this next step will enable you to perform Retargeting and Lookalike Audience marketing.
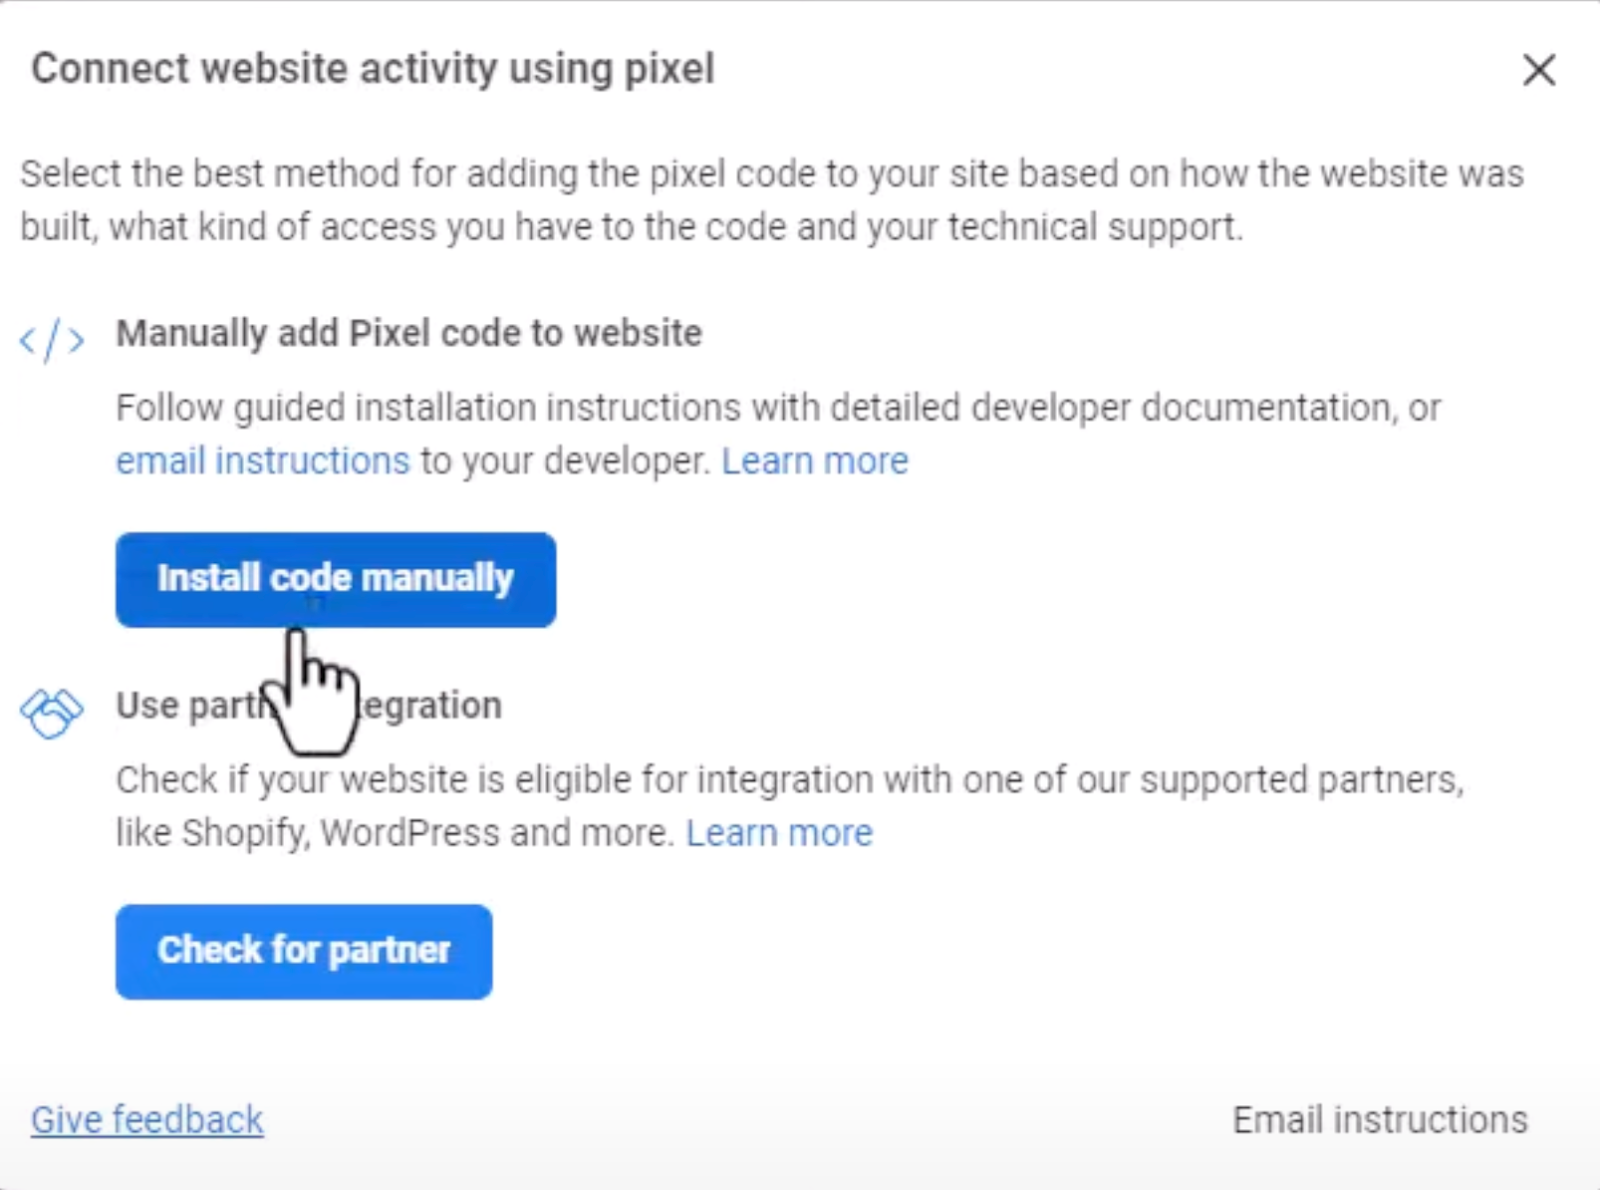
Time to head to your Ads Manager again–go back to the Pixels tab and choose Set Up Pixel. From there, you’ll see a few choices–you want to Manually Install the Code Yourself.
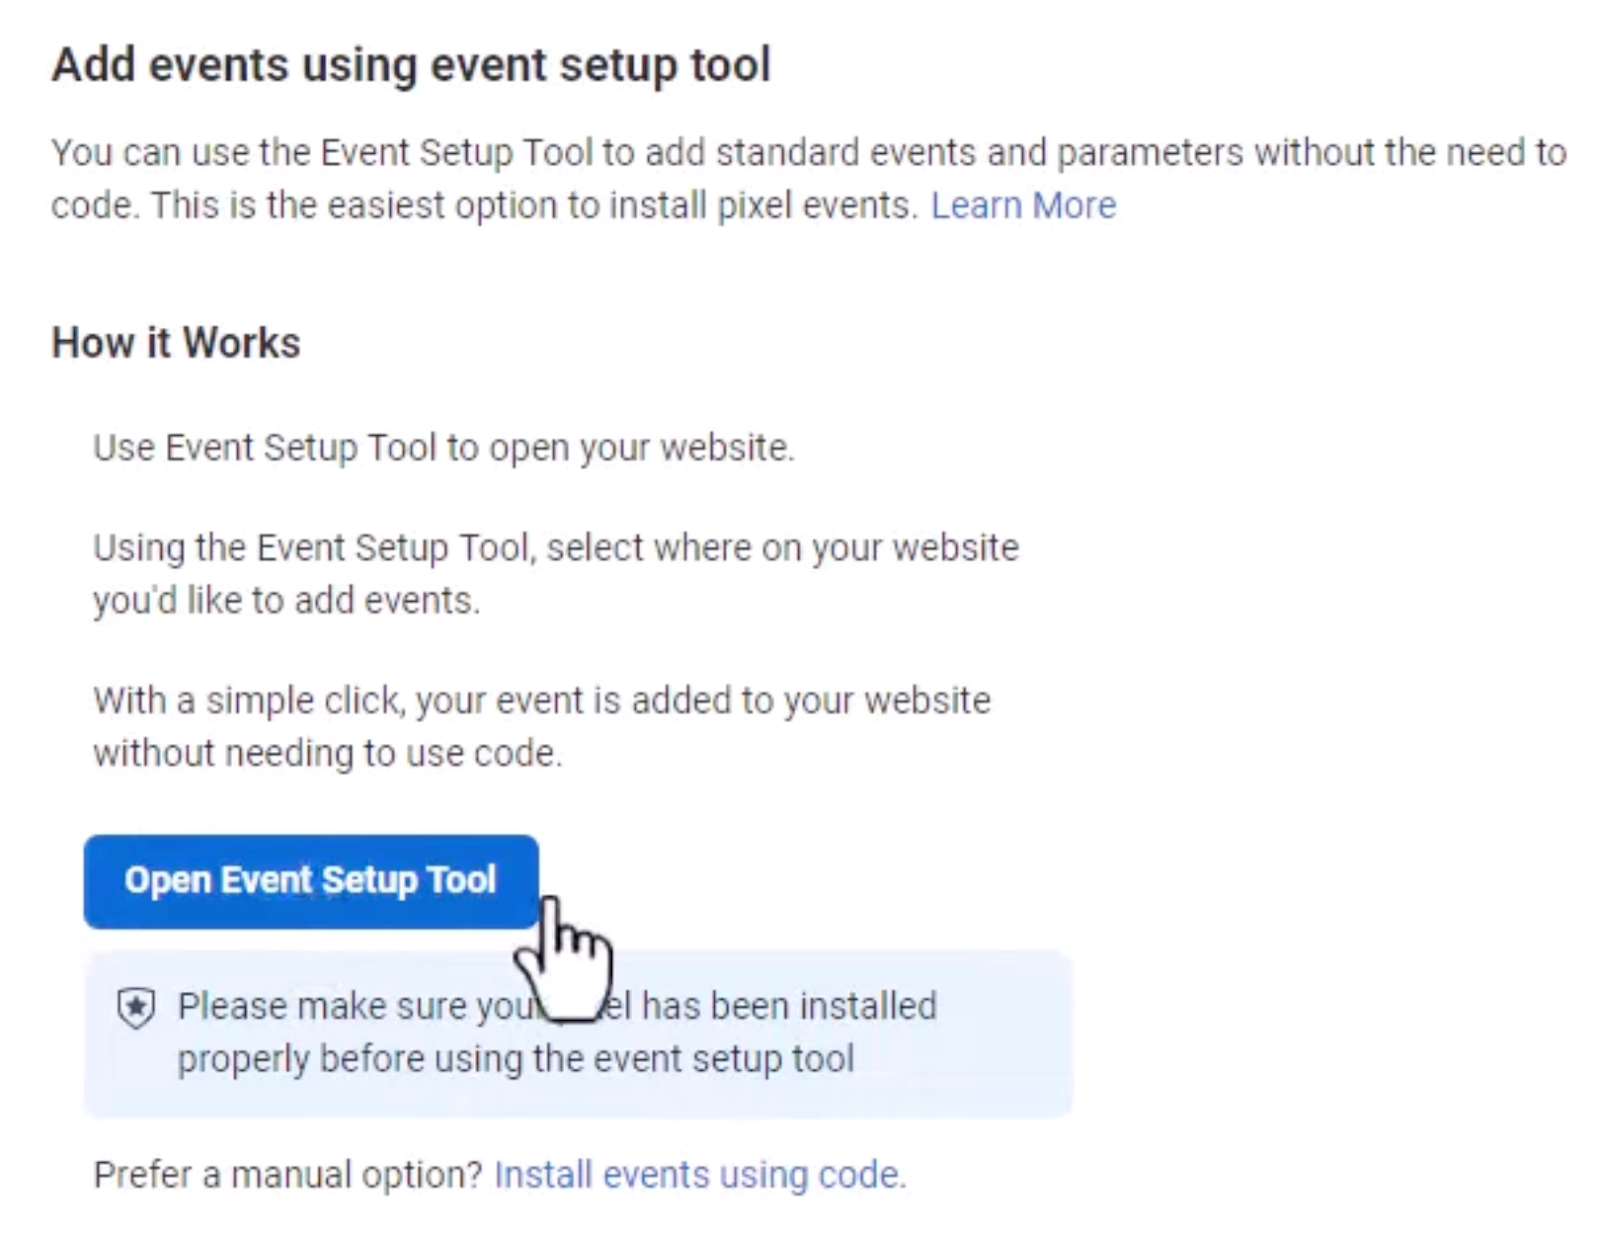
From there, you’ll answer whether or not you want to have Facebook match information on your website to people on Facebook. After responding to that option, you’ll be taken to the Event setup tool.
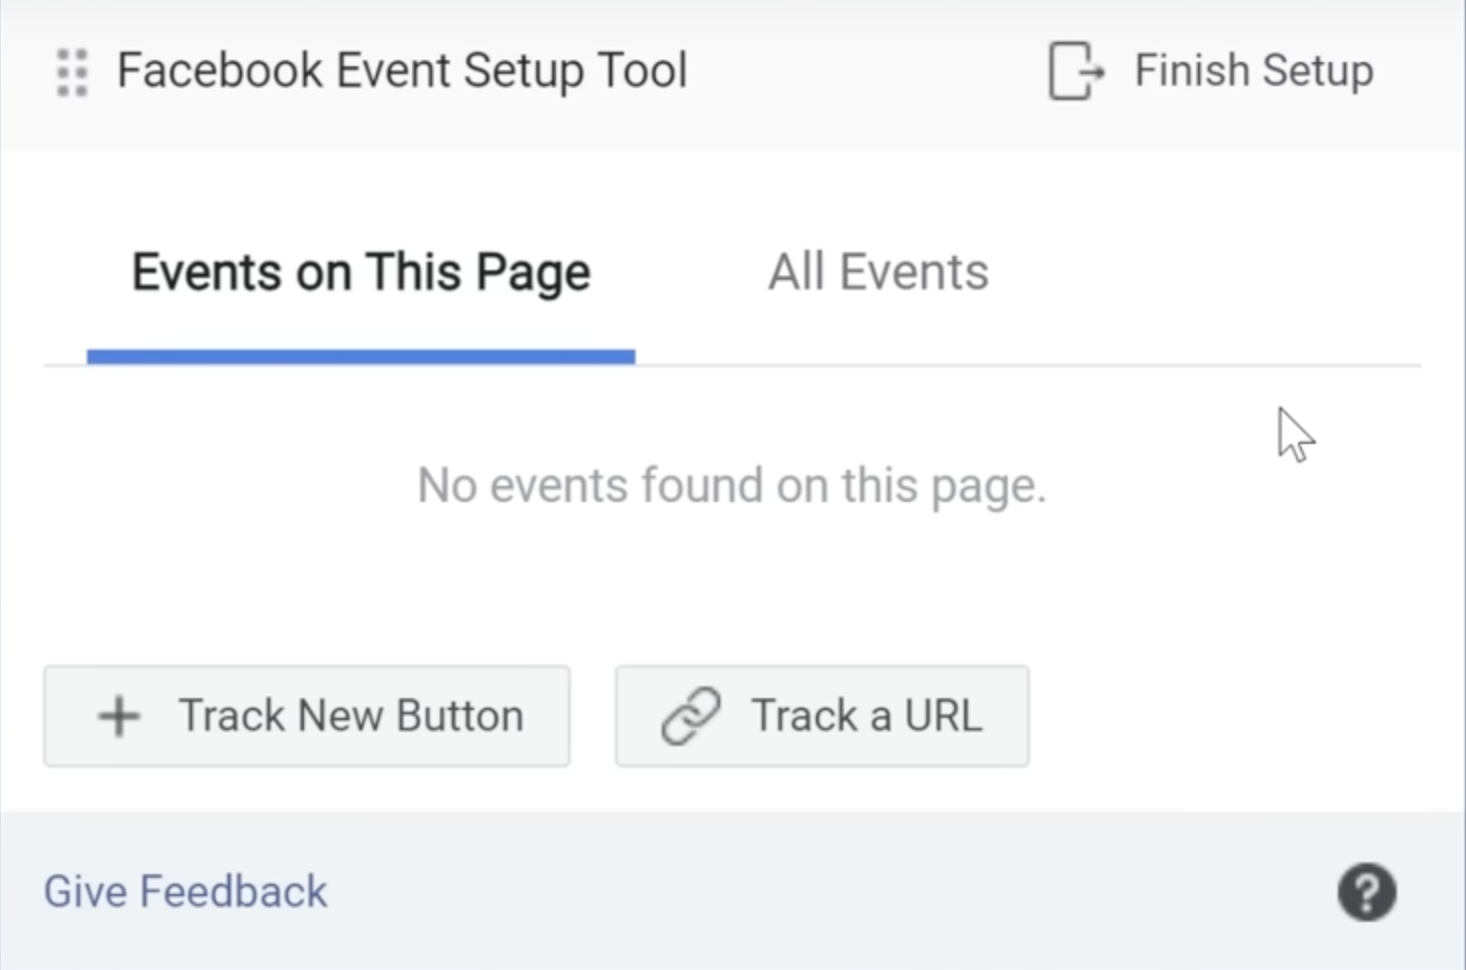
You’ll be prompted to enter your website URL in the box that pops up. On the next screen, the Event Setup Tool will appear in the top left of the screen. Choose Track New Button or Track a URL. We’ll discuss what each of these do in a moment.
Next, you should see a list of possible events to track:
The option you choose will determine which event, or user action, will get reported on. Don’t worry–you can create more than one event for your pixel to track. Some of these are not applicable, like wishlisting a product on your site. But allowing the Meta Pixel to see something like who makes a purchase and who doesn’t before leaving your site will become the backbone of our ad targeting strategy.
As for Track New Button or Track a URL, the actions are similar but perform different functions. The short explanation here is that if the event you want to track is landing on a specific page, like a “thank you for signing up” page or a verification page after purchasing, “Track a URL” is the best choice. On the other hand, if you’re looking to track individual button clicks–like clicking the “Rent” button, for example–then “Track New Button” will work best.
Once you’ve chosen that setting, you’ll also be prompted to decide if you want that data tracked as monetary value. Tracking this can help to reflect the impact your traffic and ads are having on your business.
As a final step, make sure to test your meta pixel to make sure it’s working. You can do this manually by performing the specified actions on your staging website…or you can automate that step! Installing a browser extension like the Meta Pixel Helper is a quick and easy way to make sure everything’s working properly before making the changes live on your site.
Once your pixel’s working, you’re ready to access some advanced marketing features using its data. We’ll get into those in another article–but even if you don’t want to take advantage of retargeting or lookalike audiences, your pixel can still display useful information for you, like which parts of your website are getting clicks, how far a user goes into your website before leaving, and when your Facebook ads are actually getting you traffic.
To view the data your Meta Pixel has collected, you can head over to the Ads Manager and look in the data sources section of your Events Manager. If everything’s been set up correctly, you should see data displayed there corresponding to anything you told your pixel to track.
Facebook retargeting is perfect for the needs-based, localized industry of self storage. To keep things simple, retargeting means putting an ad in front of someone who has already interacted with your business before–usually someone who has come to your website but left while trying to make a decision. These people are the perfect candidates for a quick reminder, and that targeted ad could arrive at just the right time for a customer to make their decision to rent with you.
You’ve put in a lot of work to get here–and the good news is that with your Meta Pixel installed, the next steps aren’t difficult.
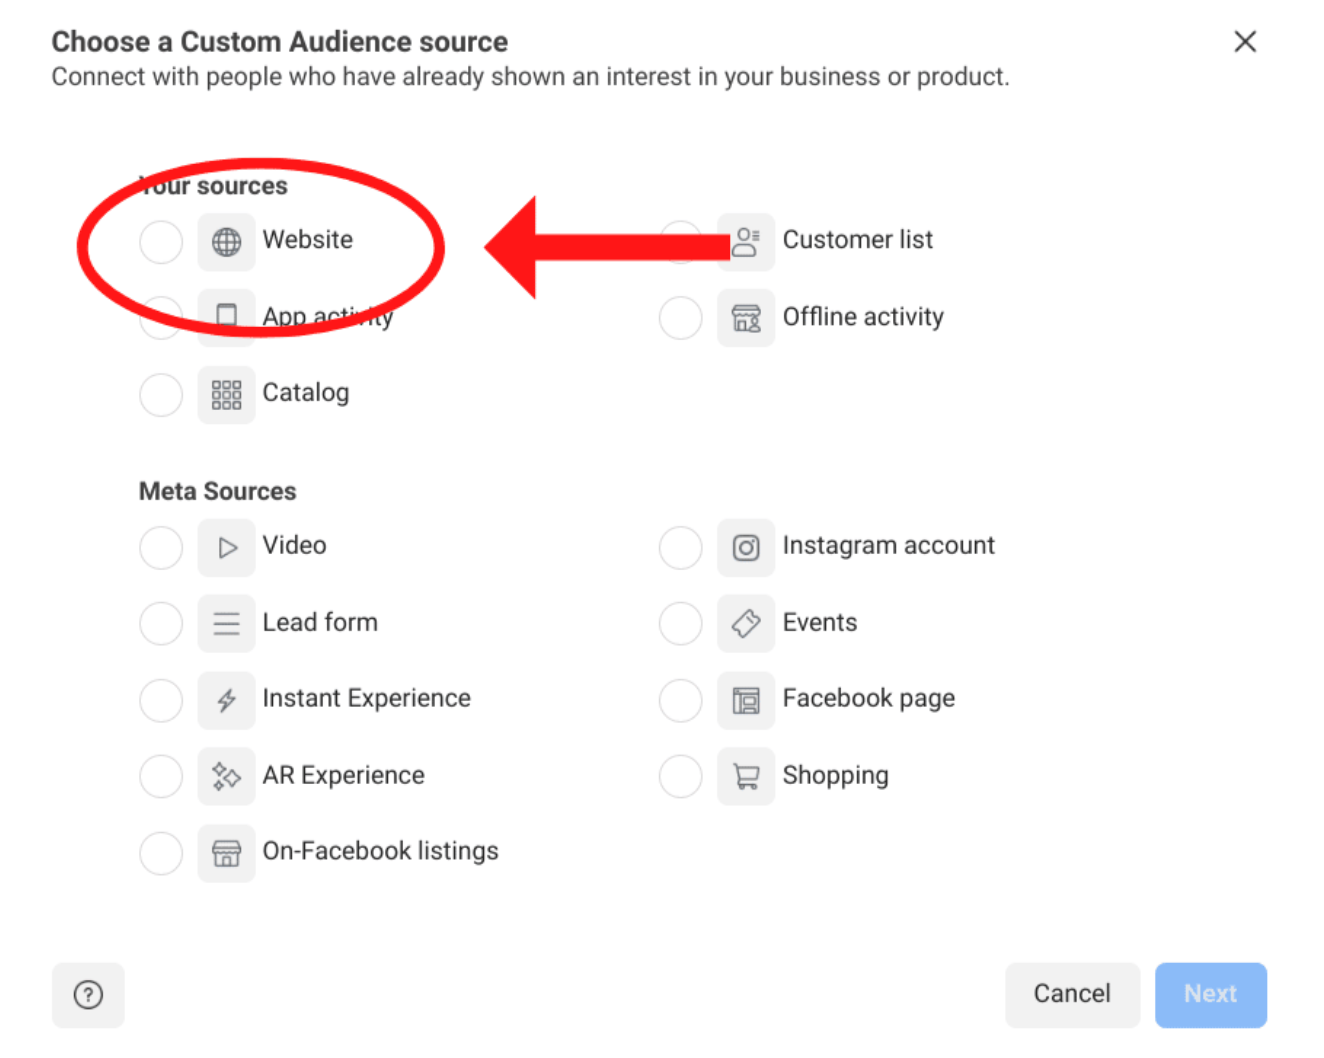
We’re headed back to the Ad Manager and looking for the Audiences section on the left side of your screen near your Events Manager. Click on Create a Custom Audience. You’ll then be prompted to choose a source for your Custom Audience. The first option under “Your Sources” is Website. Choose that.
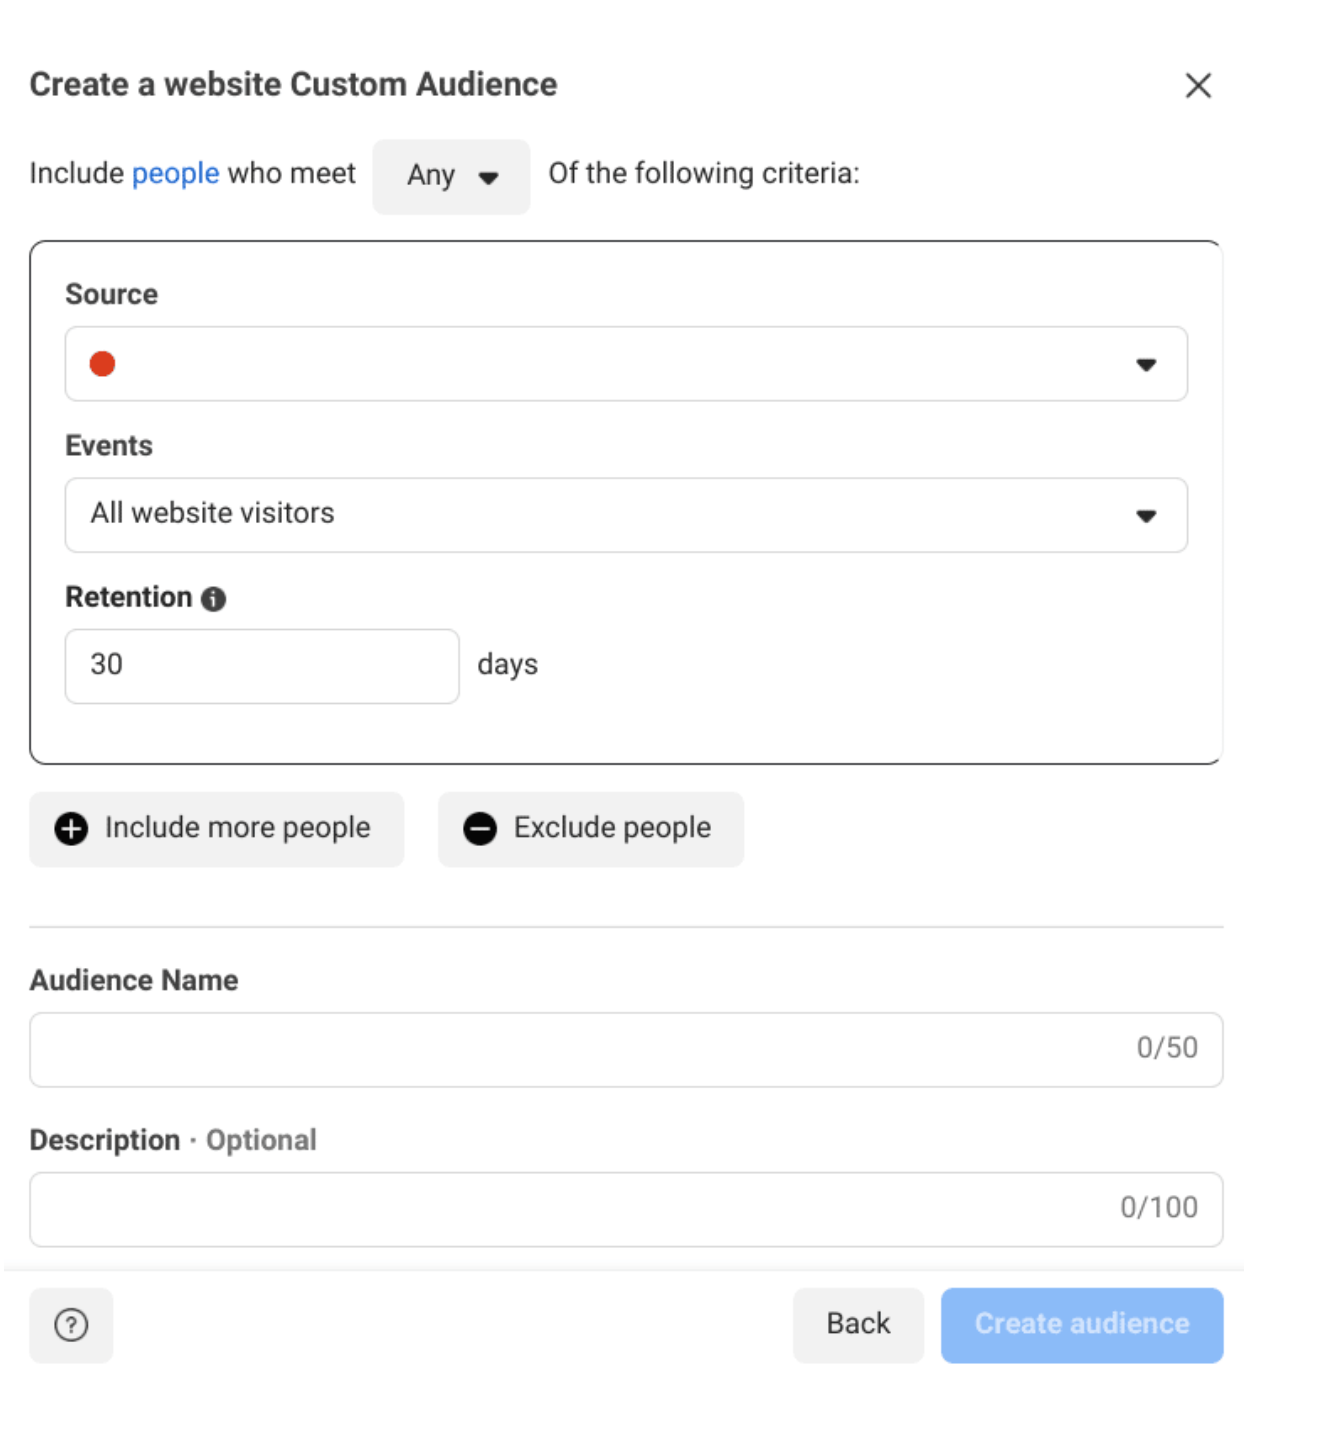
Decide whether you want this audience to include Any or All of the triggers you’re about to set by choosing that option at the top of the box that appears: “Include Accounts center accounts who meet any/all of the following criteria.” What’s the difference? If you choose Any, it means meeting any one of the criteria you’ve set, like visiting your Home page OR clicking a Rent button. Selecting All means that a user must meet all the criteria to be in the Custom Audience–they’d need to visit your Home page AND click a Rent button to be included.
In the next prompt, you’ll set your source–this is just what data set your pixel has gathered for you. You might only have one option to choose from; no worries. The next settings we’re using are even more important.
In the dropdown menu for Events, you can specify who you want included in your custom audience based on the data your pixel brought back. You’ll see a few options:
Below that, there’s a list of specific Events, like what buttons were clicked on the website. Keep in mind that in the case of visiting specific pages or clicking specific buttons, those settings will only work properly if you’ve set up your pixel to capture that kind of information.
There’s also a box labeled Retention–this is how long people will remain in this Custom Audience pool. Consider what a good amount of time is before letting a lead move on. After all, you don’t want a user who visited your site three years ago still getting ads about it!
Lastly, you’ll see two buttons below Retention: Include More People and Exclude People.
Including more people is what it sounds like: clicking on it creates a new set of metrics that looks like the settings you just created–and lets you get even more specific. Your Custom Audience could include people who visited your Rates page AND people who filled out their contact information in a form. It’s up to you how specific you want to get.
As for Excluding, you might wonder why you want to exclude leads who have visited your website. But remember that the Meta Pixel tracks everyone who’s visited your website. You have no need to send an ad to users who rented from you! For that reason, we recommend setting up some triggers to cut people who visited your site but already made a purchase out of the Custom Audience.
Name your Custom Audience and give it a description if you want. If you want to make lots of specific Custom Audiences, it’s best to come up with a naming and description convention that helps keep things organized.
Save your audience, and…ready for the best part? It’s time to put it to use. Go back to Ads Manager and get working on a real ad–but this time, when you get to Audience, choose Custom Audience. The Custom Audience you created should be there! And by setting that as your audience, your ads will be going to users who have engaged with your website, and have shown interest in renting from you.
Using the Meta Pixel for Retargeting puts your ads where they’ll have the most impact. Because self-storage is a needs based industry, spending money on people who don’t have a current need is worthless. And while building awareness is a powerful marketing tool, it’s best done in local scenes. But with the ability to Retarget, you can run a more focused, intentional ad campaign on Facebook.
Remember that this is one piece of a much larger puzzle. Your overall marketing strategy should include optimizing your Google Business Profile, running Google ads, setting up a Referral Program, and improving your customer experience for stronger word-of-mouth marketing. All of these components working together send a powerful message: your storage facility is the right place for potential renters.
And when you use every tool available, you gain a competitive edge that brings more renters to your facility. Keep growing and thriving!
Looking for more ways to advance your marketing knowledge? Check out our helpful articles to keep your momentum and secure more leads!

![[BASICS] 5 Minute Data & Reports for Self Storage Featured Image](https://cdn.storagepug.com/hubfs/%5BBASICS%5D%205%20Minute%20Data%20&%20Reports%20for%20Self%20Storage.png)